Step 3: Connect to Surface
Goal: Route your data to a Surface - the execution boundary where queries live.
What is a Surface?
A Surface is an execution boundary:
- Where warm queries run
- Where data gets processed and shaped
- Isolated context for specific work
- Can be deployed at the edge or in the cloud
Key distinction:
- Workspace level = Management, holistic view
- Surface level = Execution, specific goals
When data connects to a surface, it "spills onto" that execution boundary - creating an isolated context.
Option A: Drag and Drop
- Locate Surface in the Node Bank
- Drag it onto the canvas
- Name it (e.g., "BrewMonitor")
- Draw a connection from your "BreweryRoom" node to the Surface
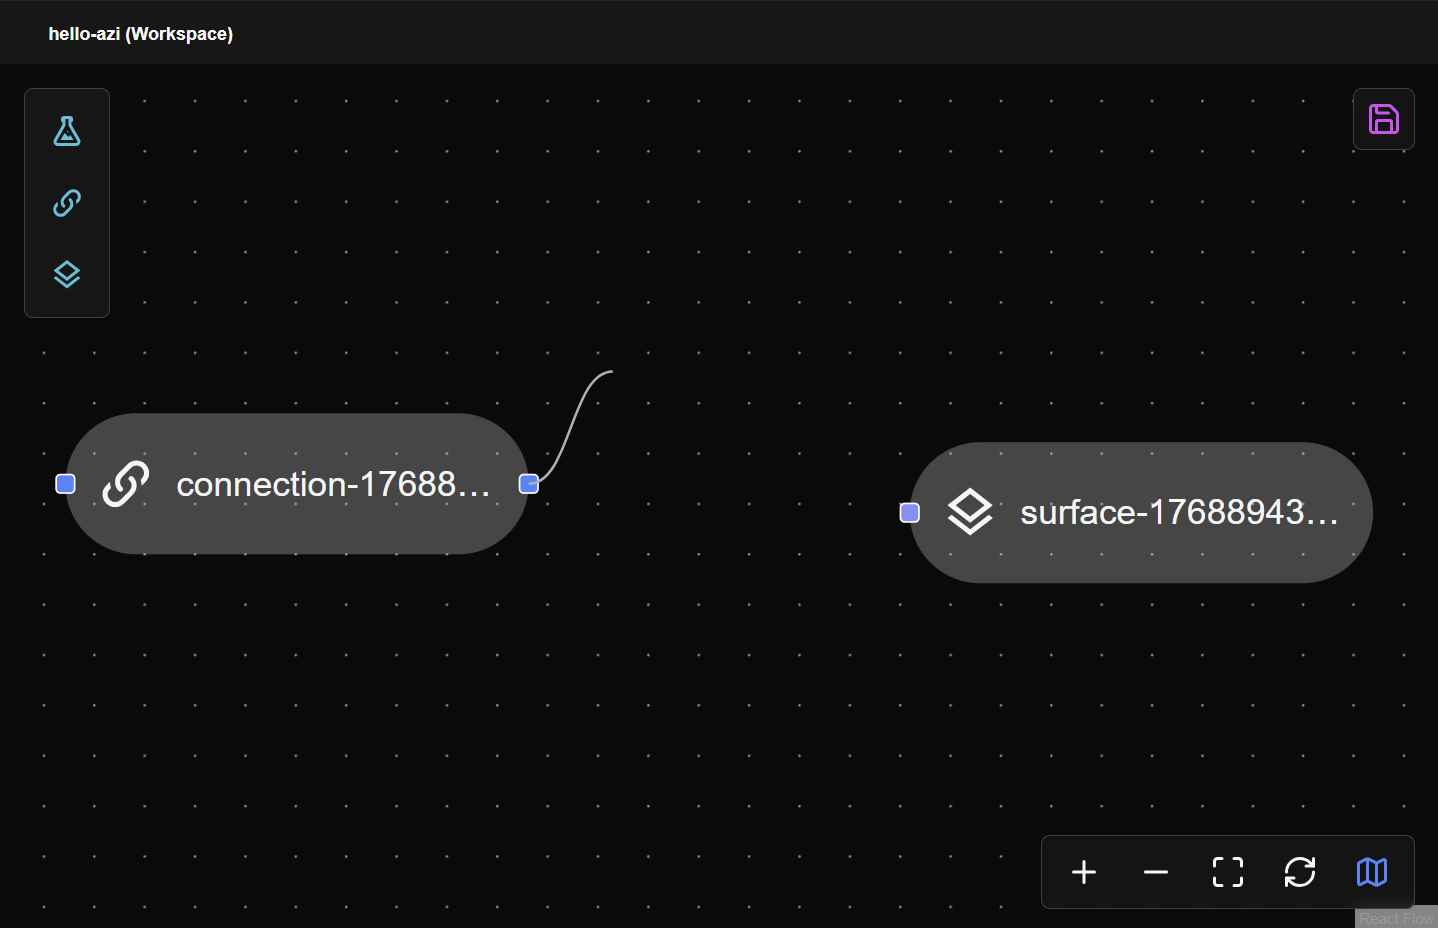
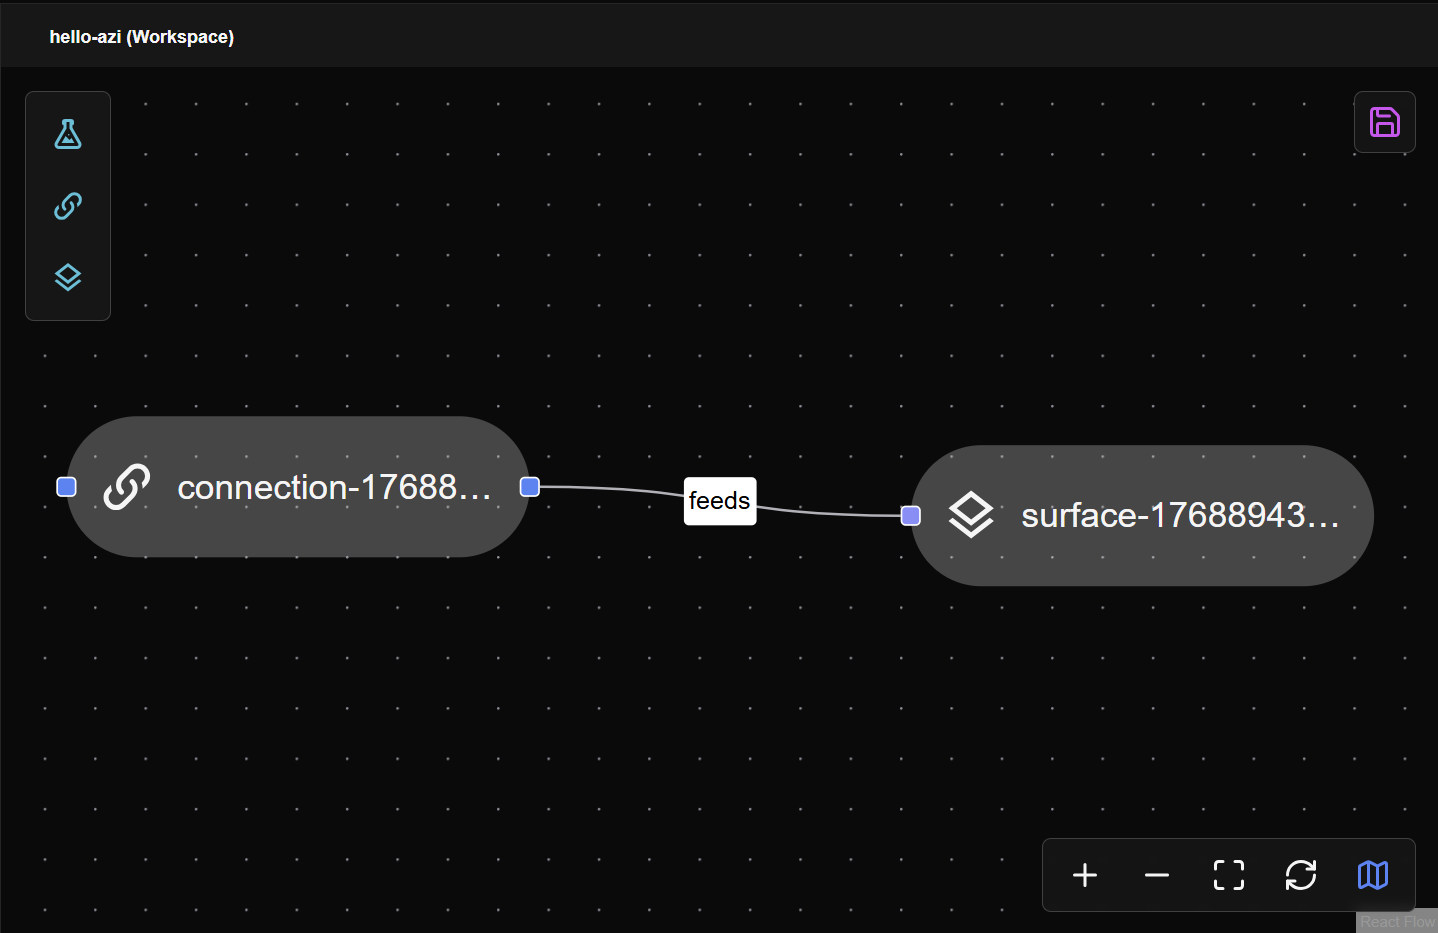
Multiple connections can feed the same surface. Multiple surfaces can share the same connection. The architecture is flexible.
Option B: Ask Azi
- Open the Azi chat panel
- Type: "Create a surface called BrewMonitor and connect BreweryRoom to it"
- Review Azi's proposal
- Click the checkmark (✓) to approve
Verify
Your surface is connected when:
- Surface node appears on the canvas
- Data flow line connects Connection → Surface
- Click the surface to see the Inspector panel on the right
- Inspector shows the surface settings and "Manage Surface" icon (cyan layered squares)
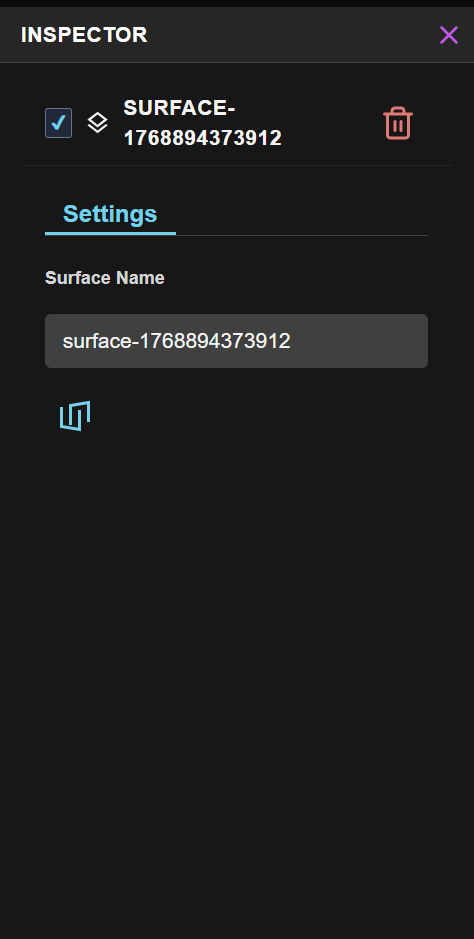
Entering the Surface
To work inside a surface:
- Click on the Surface node to open its Inspector
- In the Inspector panel, click the cyan layered squares icon ("Manage Surface")
- You're now "inside" the surface - this is where warm queries live
- The breadcrumb at the top shows:
{workspace} (Workspace) / {surface} (Surface)
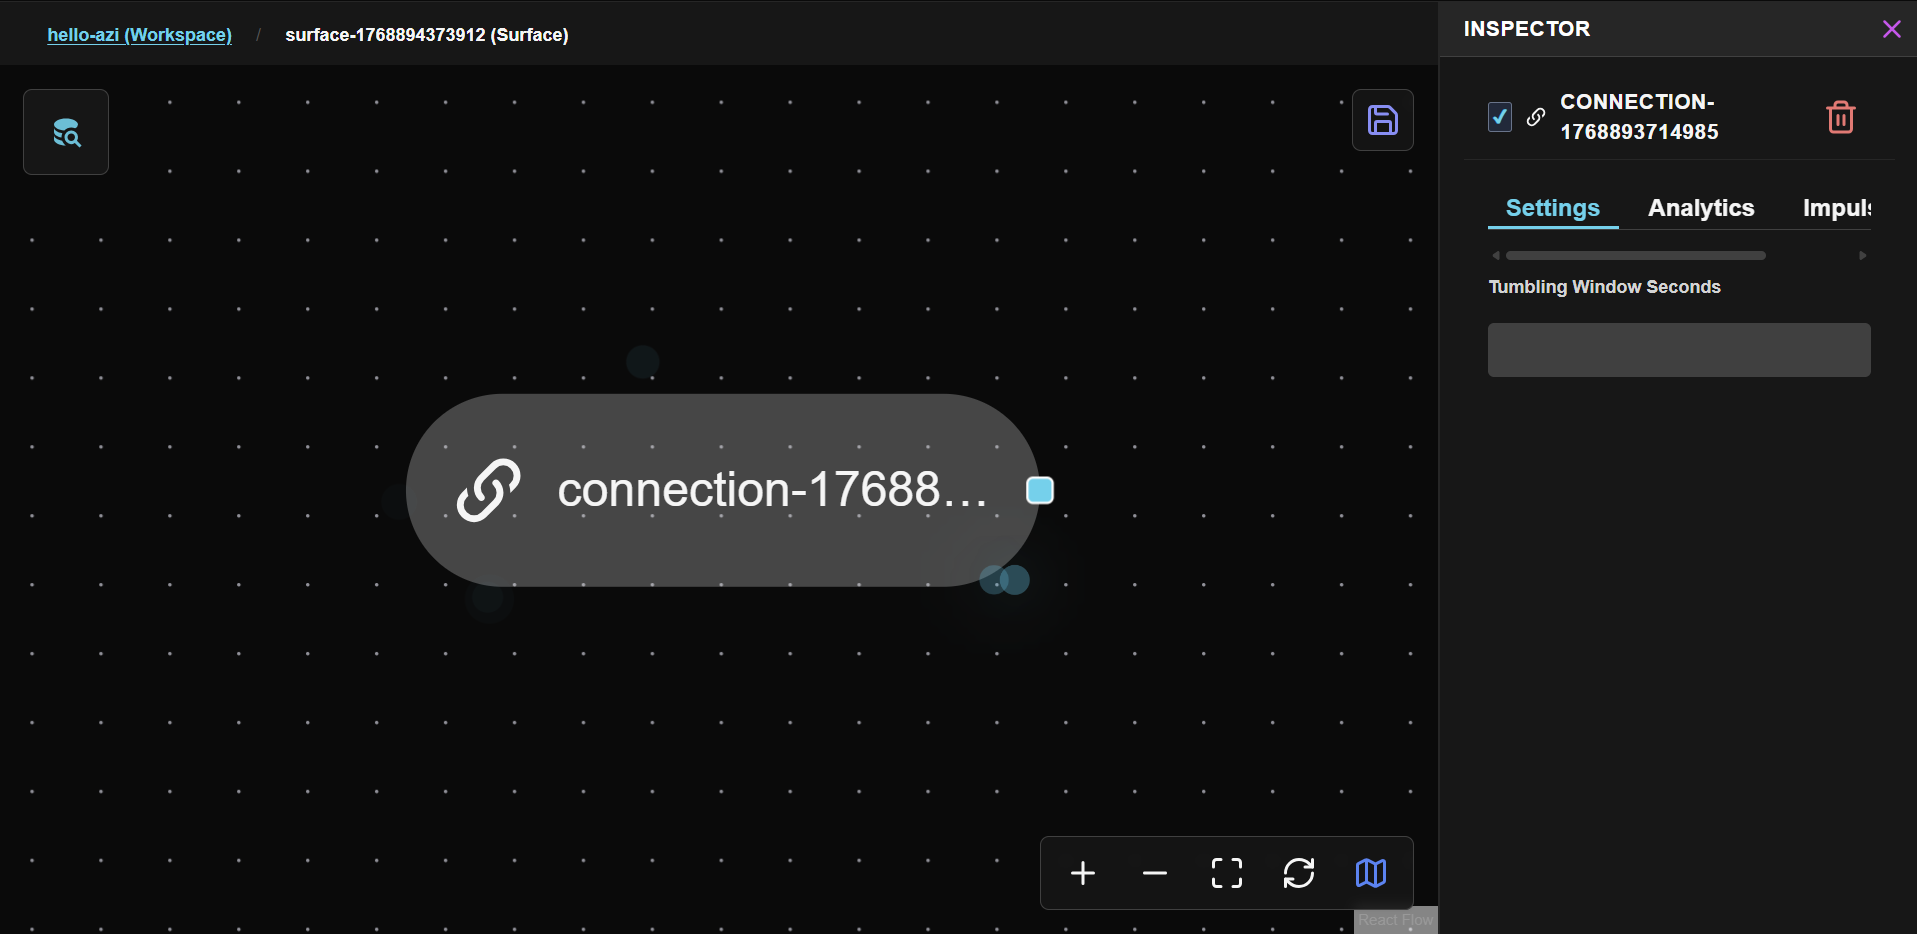
To exit the surface and return to workspace level, click the workspace name in the breadcrumb at the top.
Inside the surface, you're working in an isolated execution context. Queries you create here only see data routed to this surface.
Your data pipeline is already deployed and flowing from Step 2! If you made changes to the surface, save and deploy again before continuing.
What's Next
Your surface is connected and data is flowing. Now we'll build a Warm Query with Azi - creating and populating a query in one governed conversation.