Step 5: Use Your API
Goal: Call your governed query from anywhere - the endpoint is live and ready.
Find Your Endpoint
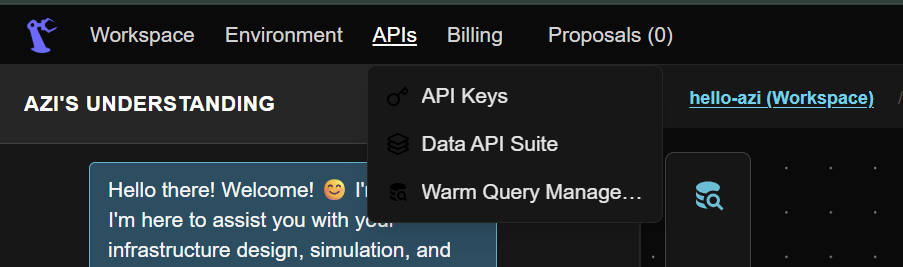
- In the Query Manager, click APIs in the menu (top bar)
- You'll see your warm query listed with connection details
- The endpoint URL is displayed with cURL and TypeScript examples
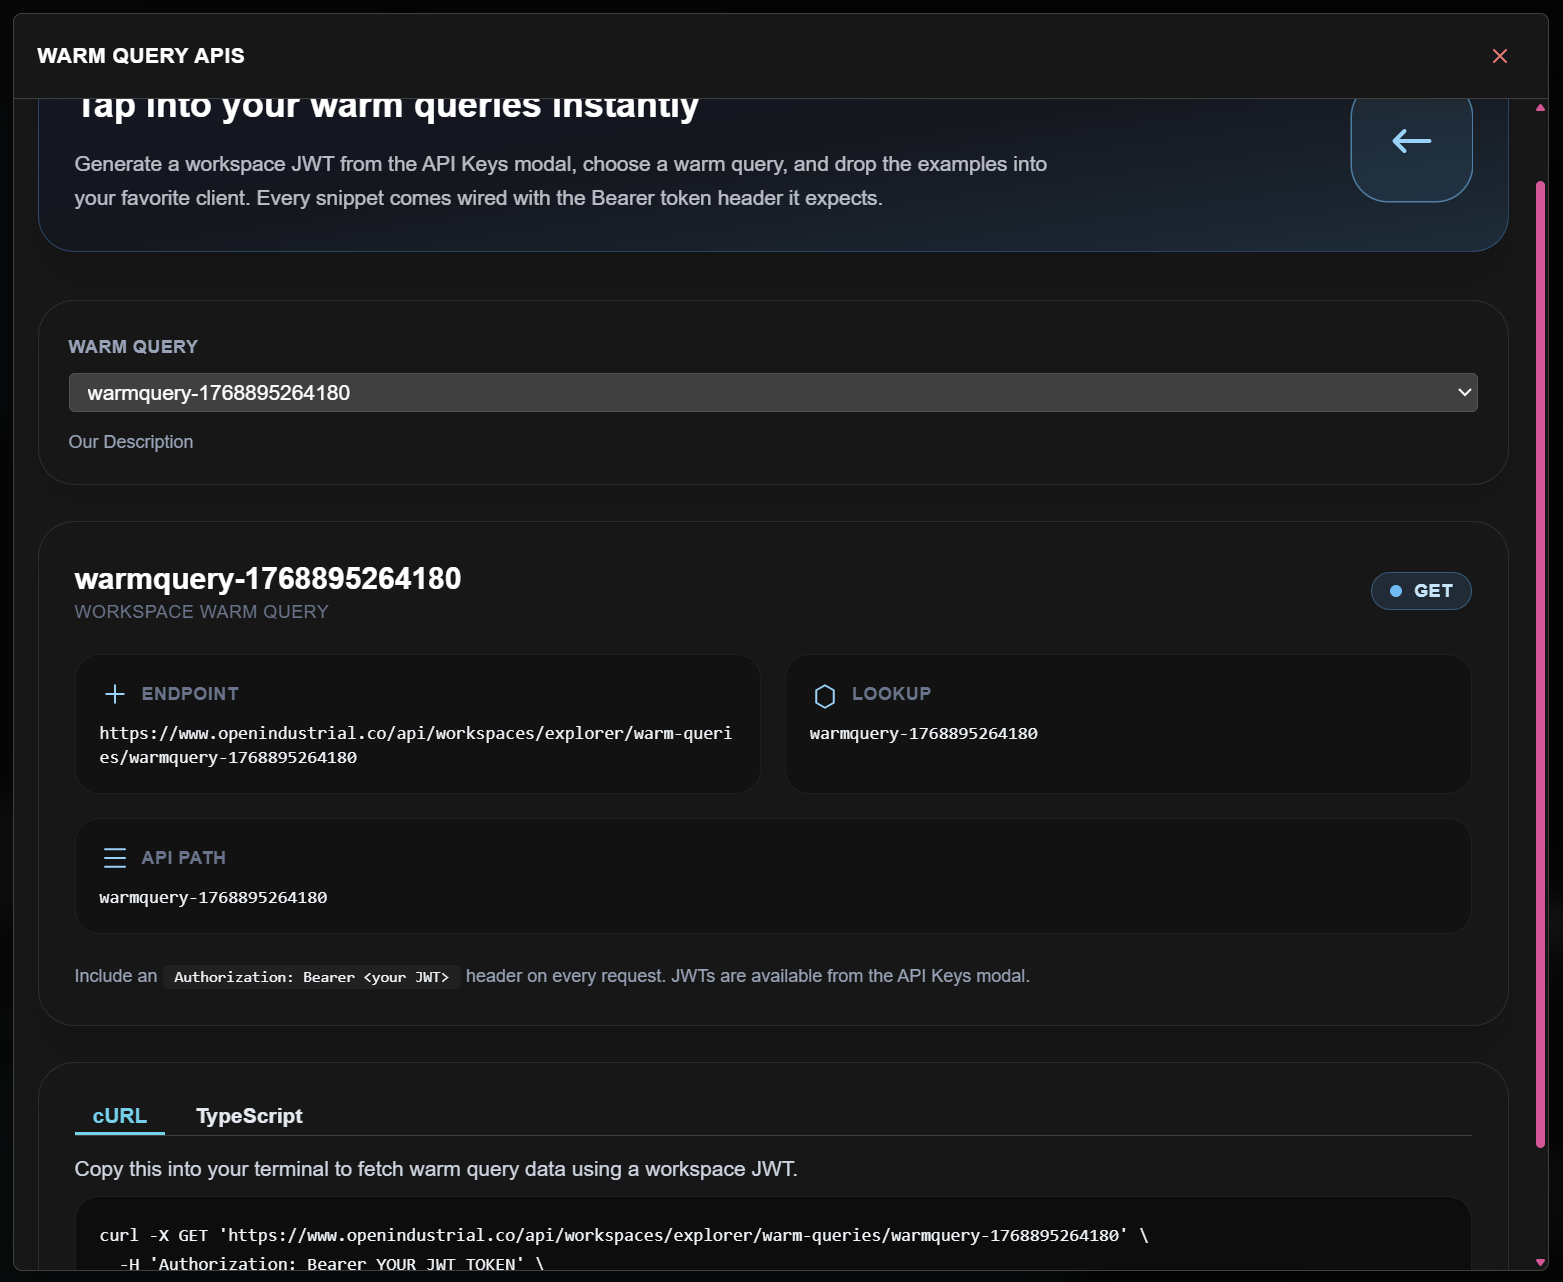
Your endpoint looks like:
https://www.openindustrial.co/api/workspaces/explorer/warm-queries/{query-id}
Generate an API Key
To authenticate:
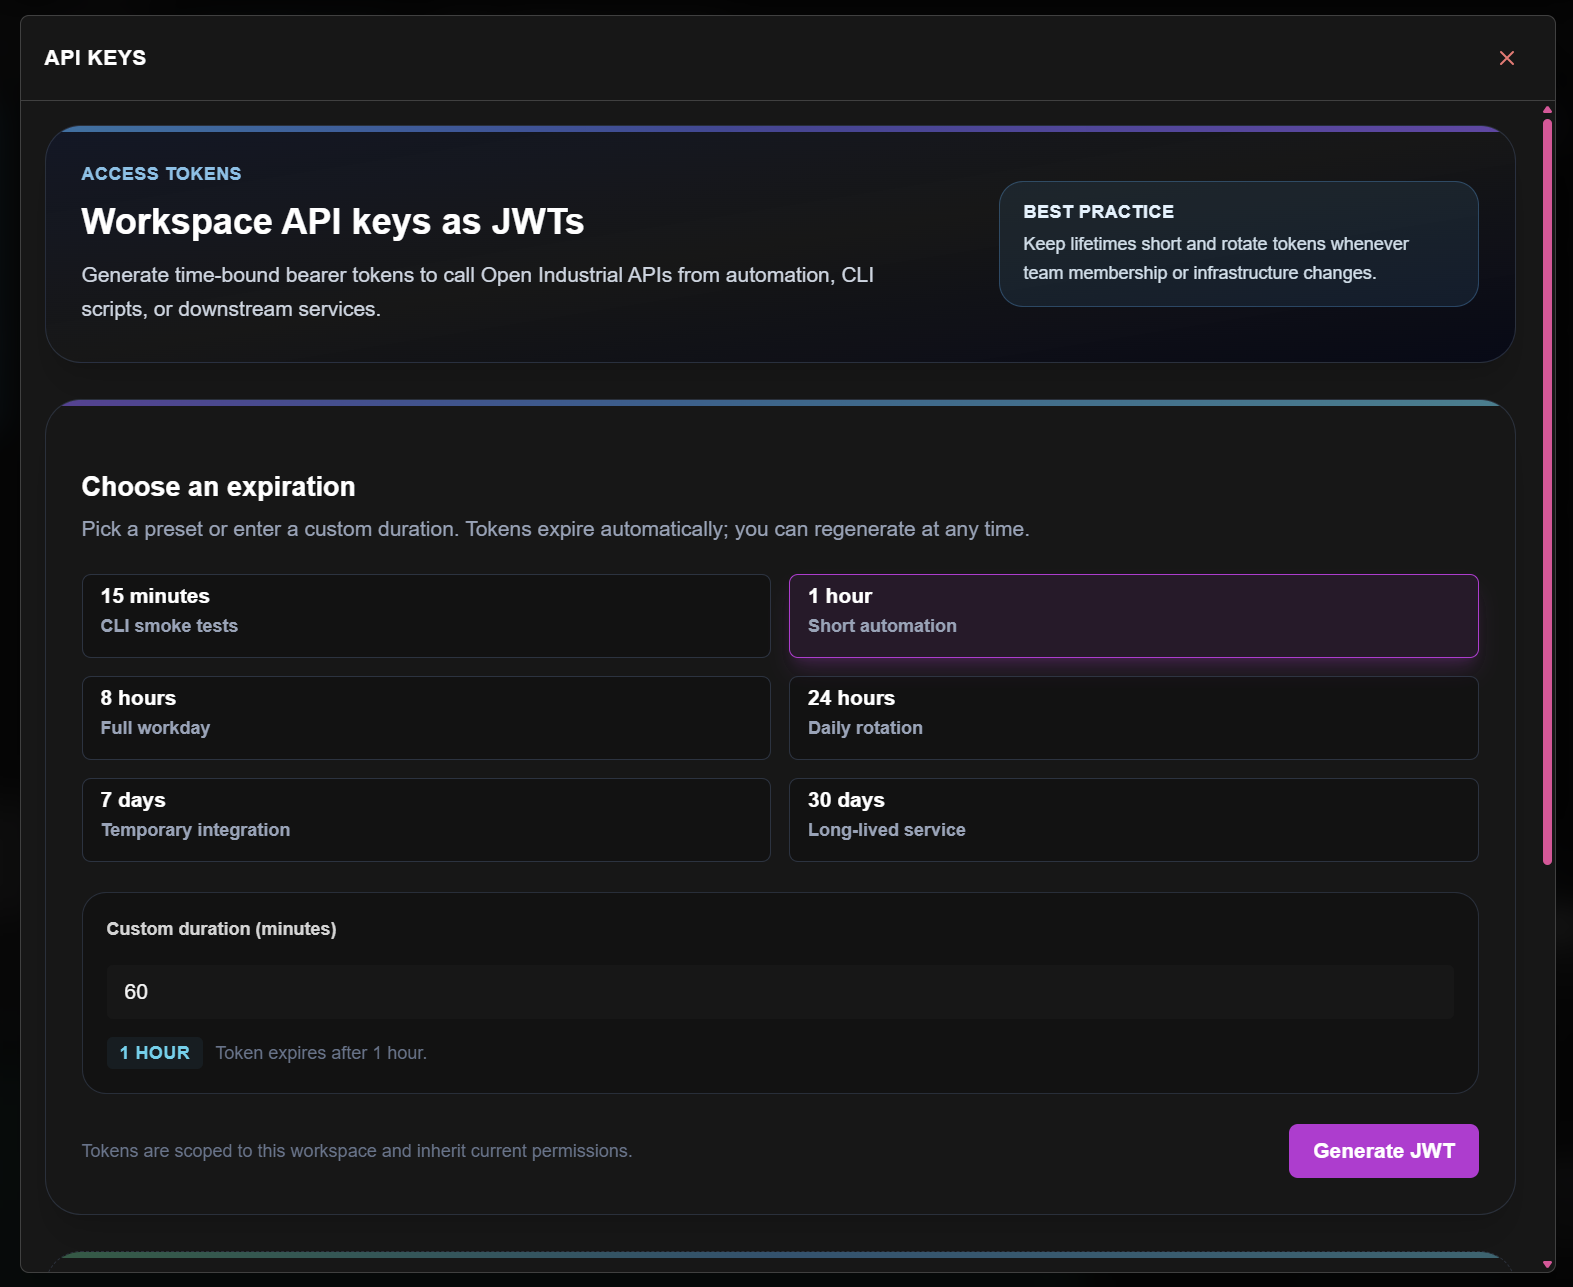
- Go to APIs Menu → API Keys
- Select an expiration preset (6 options with use-case labels):
- 15 minutes (CLI smoke tests)
- 1 hour (Short automation)
- 8 hours (Full workday)
- 24 hours (Daily rotation)
- 7 days (Temporary integration)
- 30 days (Long-lived service)
- Or enter a custom duration in minutes
- Click Generate JWT
- Copy the token - it's only shown once
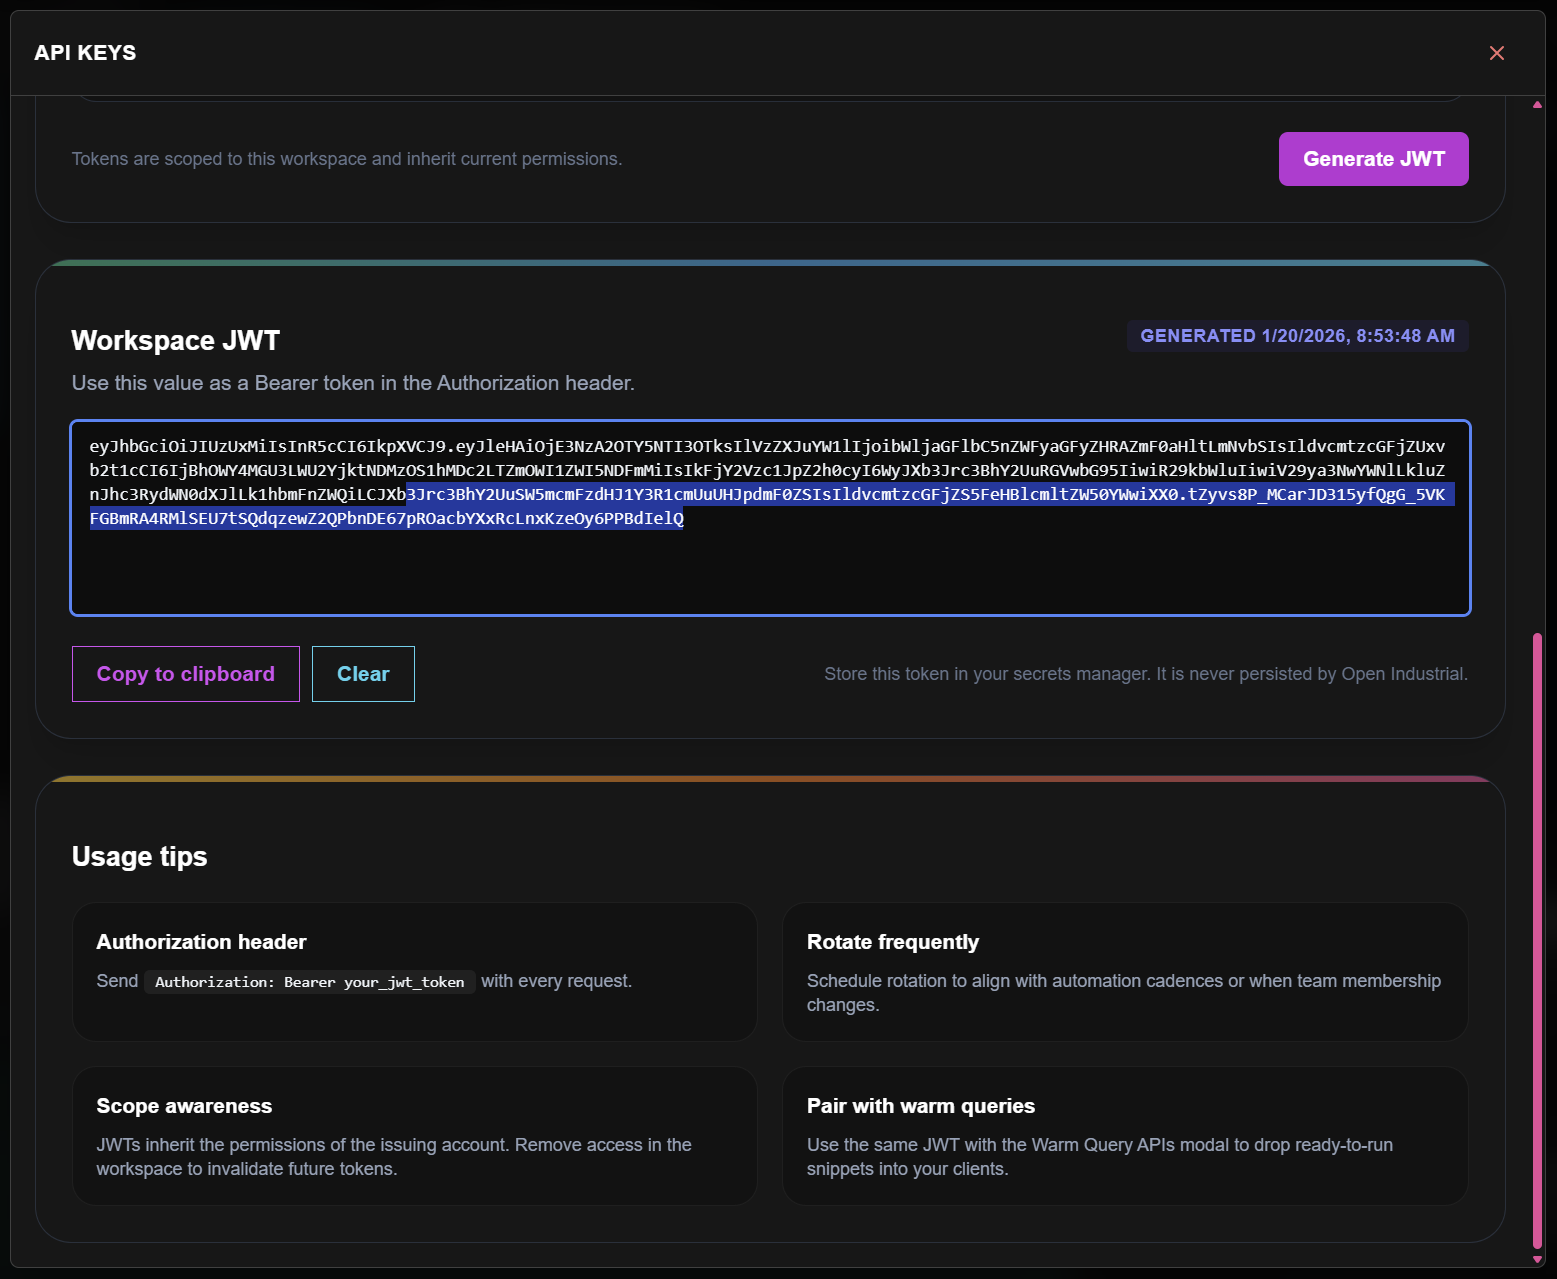
Treat API keys like passwords. Rotate them regularly and never commit them to version control.
Call the API
The Warm Query APIs modal provides ready-to-use code in cURL and TypeScript tabs:
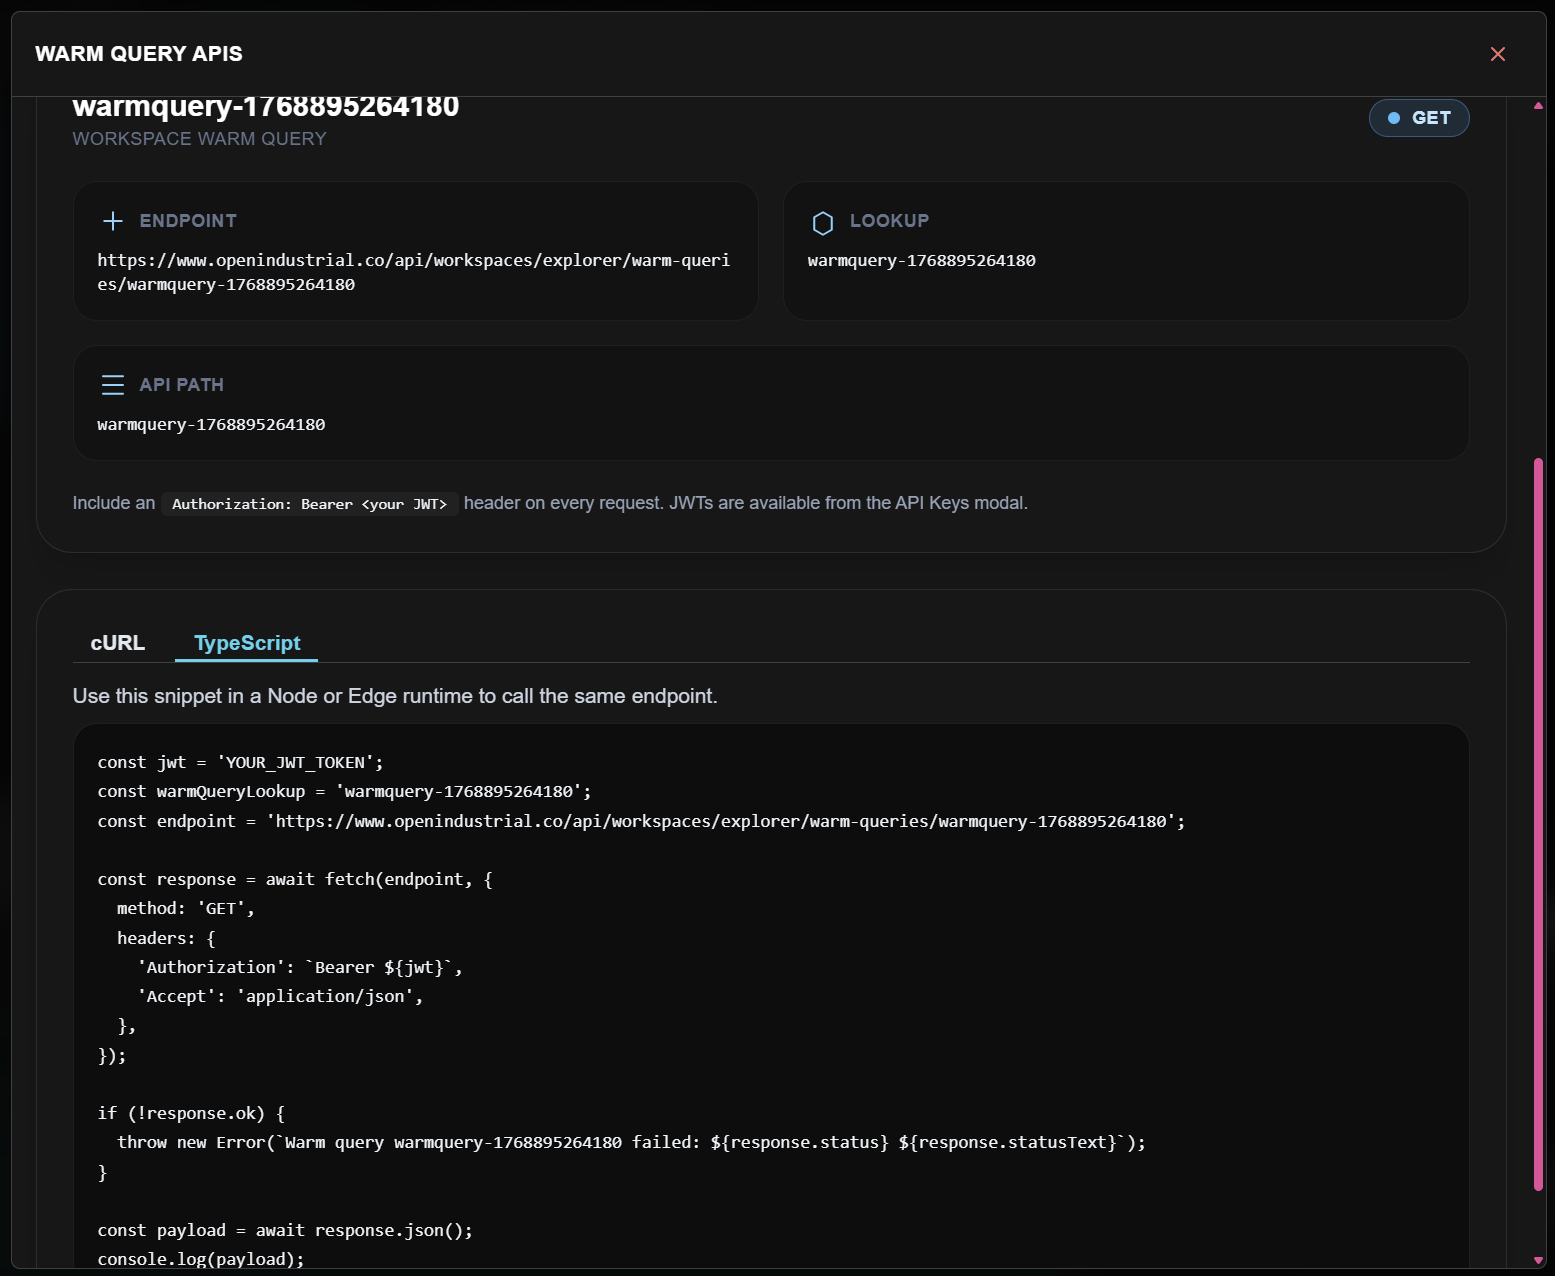
cURL
curl -X GET 'https://www.openindustrial.co/api/workspaces/explorer/warm-queries/warmquery-{id}' \
  -H 'Authorization: Bearer YOUR_JWT_TOKEN'
TypeScript
const jwt = 'YOUR_JWT_TOKEN';
const endpoint = 'https://www.openindustrial.co/api/workspaces/explorer/warm-queries/warmquery-{id}';

const response = await fetch(endpoint, {
  method: 'GET',
  headers: {
    'Authorization': `Bearer ${jwt}`,
    'Accept': 'application/json',
  },
});

if (!response.ok) {
  throw new Error(`Warm query failed: ${response.status} ${response.statusText}`);
}

const payload = await response.json();
console.log(payload);
Python
import requests

response = requests.get(
    'https://www.openindustrial.co/api/workspaces/explorer/warm-queries/warmquery-{id}',
    headers={'Authorization': f'Bearer {API_TOKEN}'}
)
data = response.json()
print(data)
Response Format
Your API returns structured JSON:
{
  "query": "temperature-avg",
  "executedAt": "2026-01-18T10:45:00Z",
  "results": [
    { "timestamp": "2026-01-18T10:00:00Z", "avg_temperature": 68.2 },
    { "timestamp": "2026-01-18T10:05:00Z", "avg_temperature": 68.5 },
    { "timestamp": "2026-01-18T10:10:00Z", "avg_temperature": 68.8 }
  ],
  "governance": {
    "queryApprovedBy": "user@example.com",
    "queryApprovedAt": "2026-01-18T09:30:00Z"
  }
}
Notice the governance metadata in the response. Every query carries attribution - who approved it and when.
Integration Destinations
Your governed API works with:
| Tool | How to Connect |
|---|---|
| Power BI | Custom data source with REST connector |
| Grafana | JSON API datasource plugin |
| Custom Dashboards | Direct HTTP calls |
| Other AI Systems | MCP-native integration |
| Scripts | cURL, Python, JavaScript |
What You Built
You just did what enterprise teams spend months building:
Data → Connection → Surface → Warm Query → Governed API
Time to First Governed Query: Under 5 minutes. This is the category metric that matters.
In this quickstart, you:
- ✅ Created a data connection
- ✅ Got live telemetry flowing
- ✅ Connected data to an execution surface
- ✅ Built a query collaboratively with Azi
- ✅ Deployed a governed API endpoint
But more importantly:
- ✅ Every proposal required your approval
- ✅ Every decision is logged with attribution
- ✅ The AI proposed, you decided
- ✅ Full audit trail from the start
Next: The "Aha Moment"
You have a governed API. But that's not the climax.
Step 6 proves "Bring Any AI" - you'll connect Claude Desktop, VS Code Copilot, or any MCP-native AI to your governed data.
This is where OpenIndustrial becomes different from every other platform. They lock you to their AI. We let you bring ANY AI.
And here's what no other platform can say: fire us, keep running. Your APIs work with standard HTTP. Your MCP connections work with any MCP-native AI. We built this so you can leave.
Continue to Step 6: Connect Any AI →
Or Explore Further
Learn more about Azi → Meet Azi
Understand governance → You Stay in Control